Using a Built-In Export Preset
Using a Built-In Export Preset
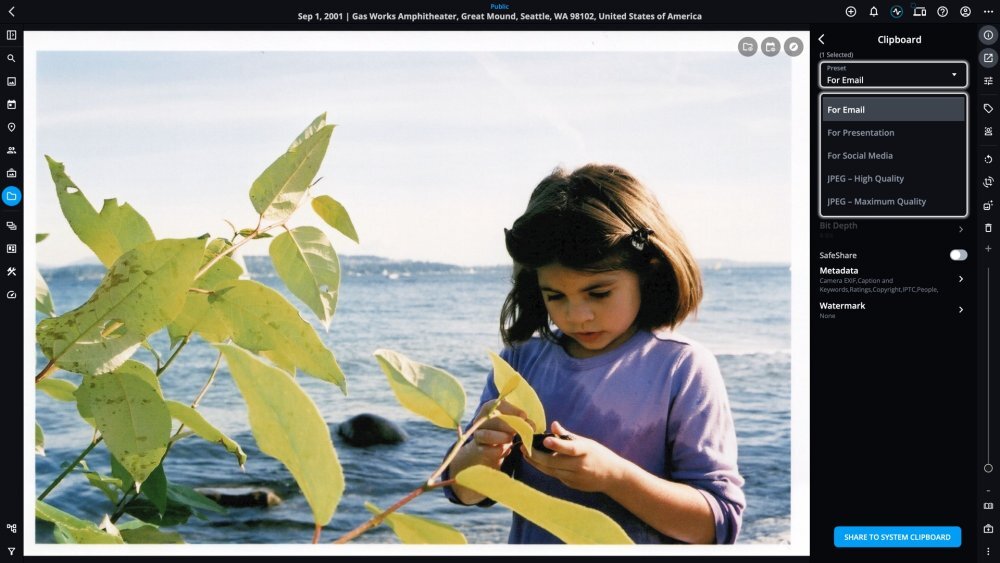
To use an export preset, click on the Share icon ![]() , then click on the settings icon
, then click on the settings icon ![]()
next to the share method you’d like to use. At the top of the settings list, click the Preset drop-down menu to select a preset.

Below is an overview of the available built-in export presets and their configurations:
-
For Email: This preset reduces the file size while maintaining sufficient quality for sending images via email, ensuring faster transmission and compatibility with common email attachment limits.
-
For Presentation: Optimized for high-resolution presentations, this preset ensures that images maintain sharpness and detail when displayed on large screens or in professional slideshows.
-
For Social Media: This preset balances high-quality output with small file size, making it ideal for sharing images on social media platforms while ensuring fast load times and optimal display.
-
JPEG – High Quality: This preset is suitable for high-quality exports where image detail is important. It is also suitable for sharing images that don’t require maximum resolution but still need to retain visual integrity.
-
JPEG – Maximum Quality: This preset is designed for archival purposes or situations where the highest image quality is critical. It preserves all possible detail in the original image.
-
JPEG – Medium Quality: This preset creates smaller file sizes by reducing quality slightly, making it suitable for scenarios where quick sharing or space-saving is a priority without sacrificing too much image clarity.
-
Printing – High Quality: This preset is ideal for professional printing where maximum detail and color accuracy are essential, such as large-scale or high-resolution prints.
-
Printing – Standard Quality: This preset is suitable for everyday prints. It provides high-quality output while keeping the file size manageable for typical print jobs.
Learn More: https://manual.mylio.com/topic/using-and-creating-export-presets
